On-boarding and Deploying Your First Devices on the Helium Network - Part 2
Expanding to a Basic Smart Building Monitoring Solution
Part 2 of this module demonstrates how to quickly onboard a typical set of smart building LoRaWAN sensors to the Helium Network and use an existing Smart Building monitoring dashboard template with the TagoIO platform.
Many IoT applications require inputs from multiple types of sensors to allow for accurate analysis of conditions. Smart building monitoring requires access to data from a group of related sensors, measuring different environmental conditions at different locations. For example, changes in temperature and/or humidity may be related to doors or windows that are open or malfunctioning HVAC equipment. The ability to monitor and analyze data from multiple sources is essential to a broader understanding of the environmental conditions of the building and what actions may be needed.
Previously in this module, we added a Dragino LDS02 door sensor to Helium Console. We then connected the Helium Console account to a TagoIO application server account. TagoIO provides the IoT dashboard and application server, including message payload decryption and decoding, downlink queuing, and downlink data encoding and encryption.
In order to speed up our onboarding when adding more sensors, we will use the “label” feature in Helium Console and a pre-built smart building dashboard “template” in TagoIO.
Labels are used to organize and manage groups of devices, which is essential as an IoT deployment expands. Labels are user-defined identifiers that can be attached to one or more devices based on certain attributes, such as sensor type or location. For example, a label may be assigned to a group of smart building sensors at specific physical addresses (Regency_Floor_1) or groups of different types of sensors. For example a group of water leak sensors. Multiple labels may be assigned to a single device to identify it as part of a larger group or subgroups. For example, a passive infrared (PIR) motion sensor may be assigned one label for a group of meeting room motion sensors on a campus, while additional labels may isolate it to a specific building, floor, or meeting room size.
Labels can be created and assigned to a device when it is being added to the Helium console. They can also be added to devices that are already provisioned to the Helium Console. Both methods will be demonstrated in this module.
When adding new devices to Helium Console, it’s easy to automatically route the data to the existing TagoIO integration simply by adding a label that is associated with the flow. More advanced users can integrate multiple data flows using multiple labels routing data from the Helium Network into their existing IoT applications and back-end servers. In addition, data can be securely routed in parallel to commercial ecosystem partners. For example, in the case of a commercial property leased to a tenant, the data from water leak sensors could be routed to both the property owner and tenant, while data from the PIR occupancy sensors would only be available to the tenant. If even more intelligence is needed, the analysis function within TagoIO can be used to create complex logic and data filtering to support most use cases.
TagoIO includes several ready-to-use and customizable IoT dashboard templates that allow organizations to quickly deploy and commercialize LoRaWAN IoT solutions. We will import and use the provided smart building dashboard template.
Summary of steps to deploy our Smart Building monitoring solution:
- Onboard new set of sensors using Helium Console
- Create a label that connects all these devices to the TagoIO integration
- Add sensor DevEUIs to TagoIO and connect them to the Smart Building monitoring dashboard
The following smart building monitoring sensor types are used in this exercise:
- Tektelic Vivid Passive Infrared (PIR) Smart Room Sensor
- Browan Water Leak Sensor
- Browan Temperature & Humidity Sensor
- Dragino door open/closed sensor (see note)
Note
The same Dragino Door Sensor is used for both the mailbox sensor and the door sensor in this module. In order to independently monitor a mailbox and an entry door, you will need two of these sensors. Alternatively, the Dragino sensor used earlier in the module for the mailbox example can be reassigned as the door sensor for the Smart Building dashboard example.
The first step is to add additional smart building sensors to Helium Console using the Over-The-Air Activation (OTAA) onboarding method. We will create and use labels to speed up onboarding and make large groups of sensors easier to manage.
As described in detail earlier in this module, LoRaWAN devices are preprogrammed with the following unique EUIs and security credentials to support the OTAA onboarding method:
- DevEUI (8-byte global end-device ID)
- AppEUI or JoinEUI (8-byte global application ID)
- AppKey (16-byte AES-128 root key, specific to the end-device. See note)
Note
Currently deployed LoRaWAN networks, including Helium, support V1.0.x compatible sensors. The LoRa Alliance has defined a v1.1.x roadmap specification. Sensors and devices supporting the 1.1.x release will maintain backward compatibility with 1.0.x networks. However, 1.1.x devices support two security keys, the AppKey and NwkKey. A 1.1.x end-device will use its NwkKey (in lieu of its AppKey) to join a 1.0.x LoRaWAN network. Please refer to section 6.1.1.3 Device root keys (AppKey & NwkKey) of the LoRaWAN 1.1 Specification for full details.
LoRaWAN device EUIs may be printed on the label of the device, as shown below with the Browan Water Leak and Temperature Humidity Sensors. The Browan sensors are LoRaWAN 1.1.x compatible and therefore provide both a AppKey and NwkKey. Since we are using these Browan sensors on a 1.0.x LoRaWAN compatible network, we will use each device’s NwkKey as the AppKey when onboarding them to the Helium network. The EUIs, AppKey, and NwkKey are provided via CSV files from either the manufacturer or distributor where the device was purchased.
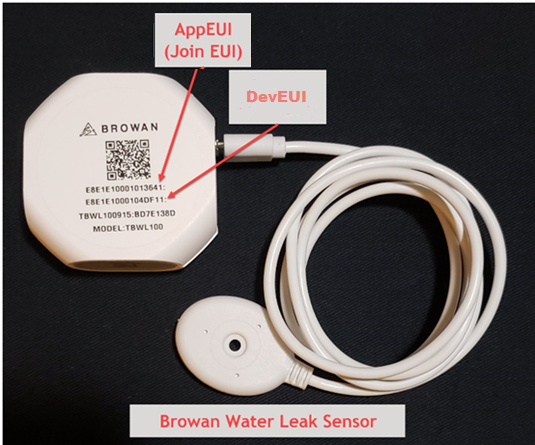
Example of Browan Sensor with EUIs printed on label
Obtain the EUI for the Tektelic Vivid PIR Smart Room Sensor by scanning the QR code on the device.
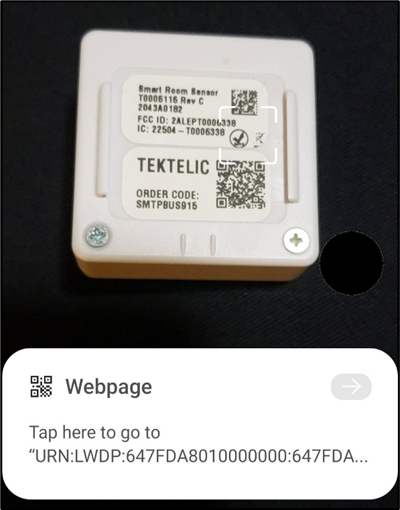
Example of Tektelic Sensor with QR code for EUIs
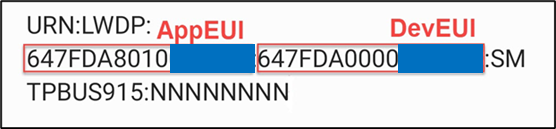
Text file containing EUIs
The EUIs and AppKey for the Tektelic device are provided in a downloadable CSV file from either the manufacturer or distributor where the device was purchased. Like the Dragino sensor, the Tektelic is a native LoRaWAN v1.0.x device and the device’s AppKey is used.
Optional: Creating and importing a CSV file with the required EUIs, AppKeys, device names, and labels is recommended when onboarding large groups of sensors. When adding a new device to Helium Console, see instructions on how to format the CSV and then drag files to upload devices. The required CSV file field headers are DevEUI, AppEUI, AppKey, and Name. Optional fields include LabelID and LabelID2. Although technically these label fields are optional, when adding bulk devices via a CSV file, creating and using labels is necessary to prevent needing to go back and manually add data flows to each device.
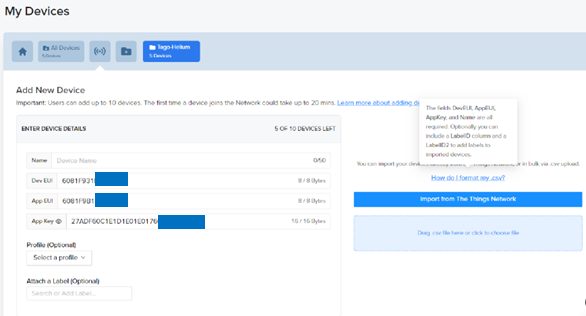
See option to import CSV file to add multiple devices
Carefully review the following instructions on creating a label before attempting to add new devices via a CSV upload:
Further device onboarding automation can be achieved via the Create Device API integration with Helium Console. CSV file uploads and API integrations are alternative methods to onboarding devices in bulk. Refer to the Helium documentation at doc.helium.com for details on these methods.
Before proceeding to the next steps to manually add the set of Smart Building sensors, make sure that you have the complete set of EUIs and Keys for your devices.
Once you have located the EUIs and Keys for your sensors, we can start adding them to your Helium Console account. Make sure you have logged into your Helium Console account using your email address.
We will start with the Browan Water Leak Sensor.
To add a new LoRaWAN device to Helium Console, click the “+” icon in the lower right corner of the screen and select “Add Device.”
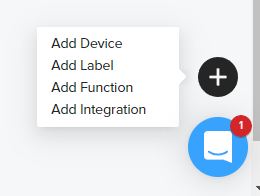
Add button menu options
Enter the required information for the device on the Add New Device window:
- Give your device a descriptive name (e.g. Leak Sensor).
- Enter the correct DevEUI, AppEUI (JoinEUI), and AppKey for your device.
Remember, for this 1.1.x compatible Browan device, use the device’s NwkKey value in the Helium Console App Key field.
- Select the proper group profile for your device (e.g., US915 Stationary).
Note
As was the case with the sensor we added earlier in this module, the sensors we are deploying in this module are in fixed locations within the United States. Therefore, we will use the “US915 Stationary” profile.
- Adaptive Data Rate (ADR) is used because our sensors are stationary.
- Join-Accept CF list must be enabled since we are in the US915 channel plan. (Recall that Join-Accept CF selection allows the network to tell the device which radio channels are used for communication.)
- Additionally, the RX1 window timing is relaxed to 2 seconds.
For more details, refer to Creating a New Profile earlier in this module.
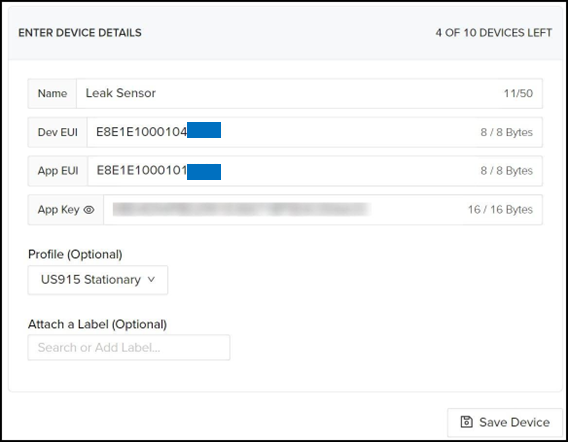
Browan Water Leak Sensor: Device name, device-specific EUIs and AppKey, and US915 Stationary profile.
When all information has been entered, click “Save Device.”
Note
The Browan Temperature & Humidity Sensor and the Tektelic Vivid PIR Smart Room Sensor will be added later in this module.
Next, we will create a label to speed up device onboarding and help manage larger IoT deployments. Specifically, we associate a unique label name with the TagoIO data integration data flow. Once this label is created, any device assigned to it will automatically have its messages forwarded to the TagoIO integration flow created earlier in this module. This will significantly reduce the number of steps needed to onboard new devices.
To add a new label, click the Add New Label folder icon at the top of the Devices screen.
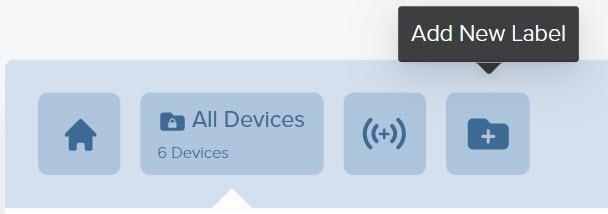
Add New Label
Alternatively, click the Add “+” button that is available from all console screens in the lower right hand corner.
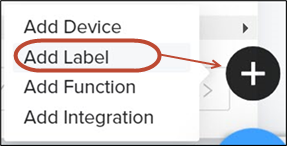
Add button menu options
Now, enter the details for the new label.
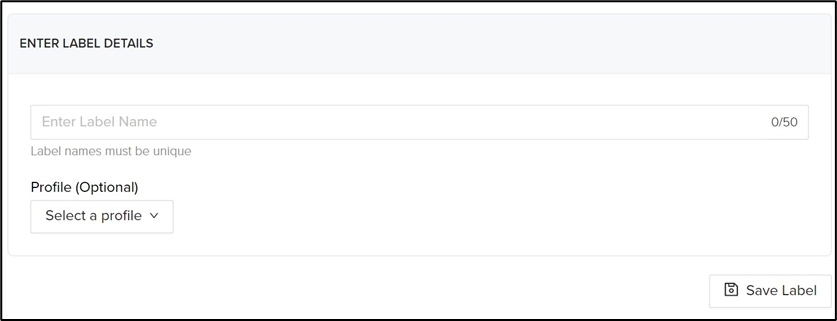
Enter Label Details
Create a unique label name that defines the group attributes. In this example, we will use the name Tago-Helium, which will be applied to all devices that will use the TagoIO application server.
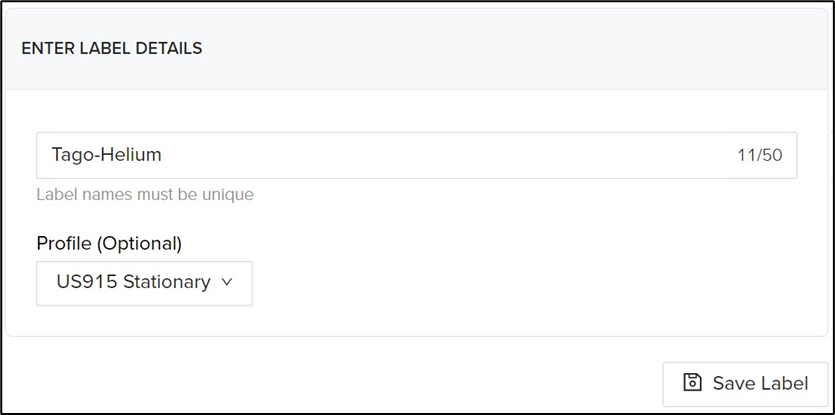
Enter Label Details example
Optionally, you may also specify the device profile within the label definition. This is useful when all devices within a group share the same profile. In this example, we use the “US915 Stationary” profile that we created in earlier in this module.
Once the label has been created, it appears at the top of the My Devices screen.
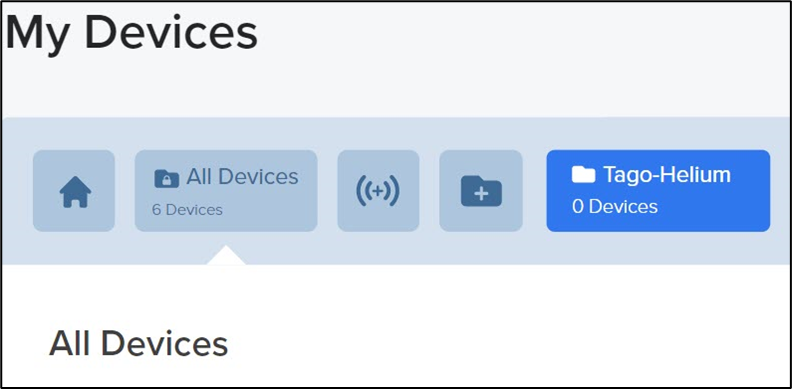
Tago-Helium label icon
Click the Tago-Helium label icon to see the details for this label. Notice that there are no devices associated with this label yet. There are multiple ways to add a label to an existing device. Given that we are already on the label details screen, we will use a Quick Action to add this label to an existing device.
From the menu on the left, select the Quick Action drop-down menu. Select Add this Label to a Device.


New Label Details: Quick Action menu options to add label to existing device.
From the list of available devices, select the device to which you wish to apply this label. In this case, we will select the Mailbox sensor we created earlier in this module.
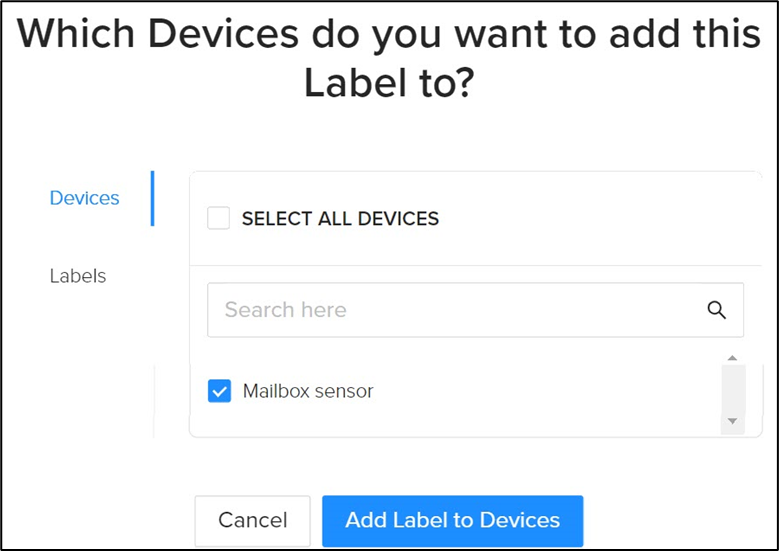
New Label Details: Quick Action menu options
Check the box next to the device to which the label is to be applied, then click Add Label to Devices.
The device is now added to the Tago-Helium label group.
Repeat this process to add the Tago-Helium label to the Leak Sensor.

Verify that the Tago-Helium label is associated with both sensors.
Next, we will add the Tektelic Vivid PIR Smart Room Sensor to your Helium Console account. Important: We will assign a label to the device during the Add Device process.
To add a new LoRaWAN device to Helium Console, click the “+” icon in the lower right corner of the screen and select Add Device.
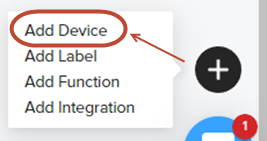
Add button menu options
Enter the required information for the device in the Add New Device window:
- Give your device a descriptive name (e.g., “Motion Sensor”).
- Enter the correct DevEUI, AppEUI (JoinEUI), and AppKey for your device.
- Select the proper group profile for your device (e.g., US915 Stationary).
- Attach the Tago-Helium label we created in the previous step.
Below is an example of the Add New Device screen for the PIR sensor showing the drop-down menu for attaching a label. As an alternative to using the drop-down menu, you can also search for a label.
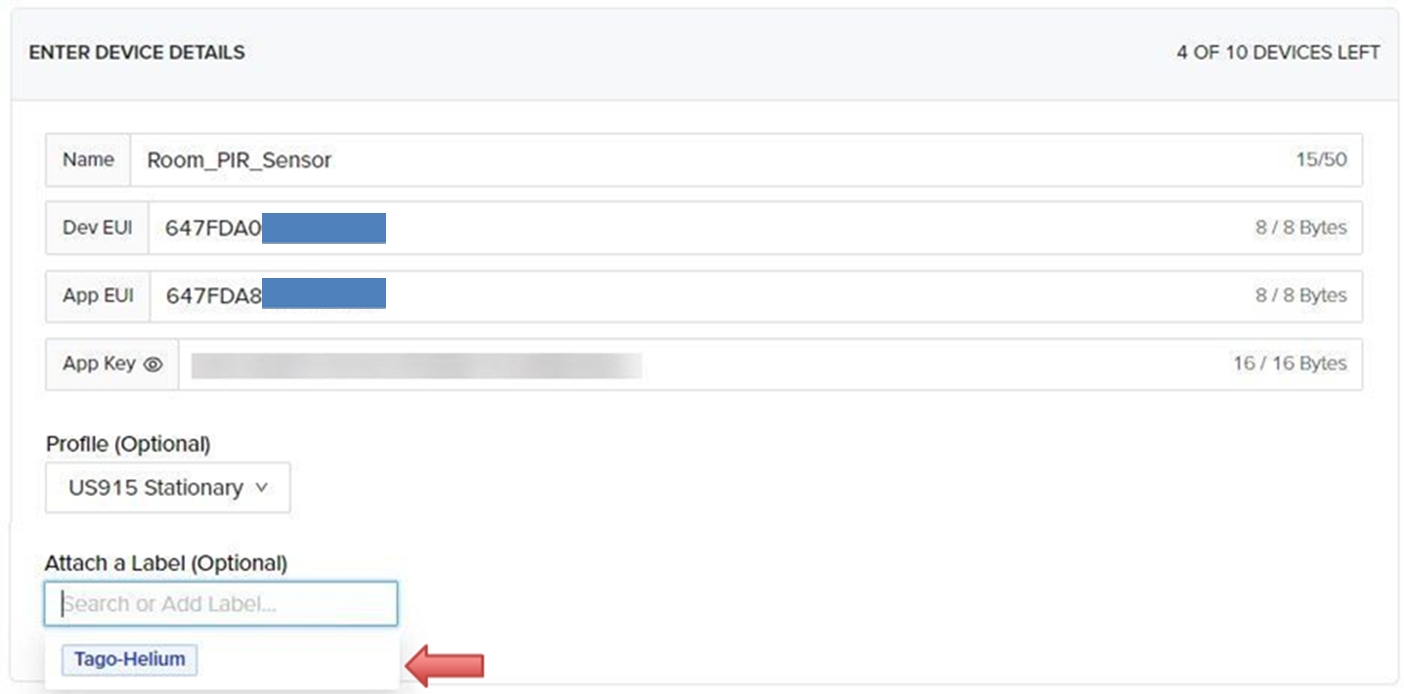
Tektelic PIR Sensor: Device name, device-specific EUIs, AppKey, profile, and label.
When you have entered all of the information, click Save Device.
Now, add the Browan Temperature & Humidity Sensor to Helium Console by repeating the Add Device process. Remember to add the Tago-Helium label and use the device’s NwkKey value as the AppKey.
Below is an example of the Enter Device Details screen for the Browan temperature sensor. Note that the Tago-Helium label is attached.
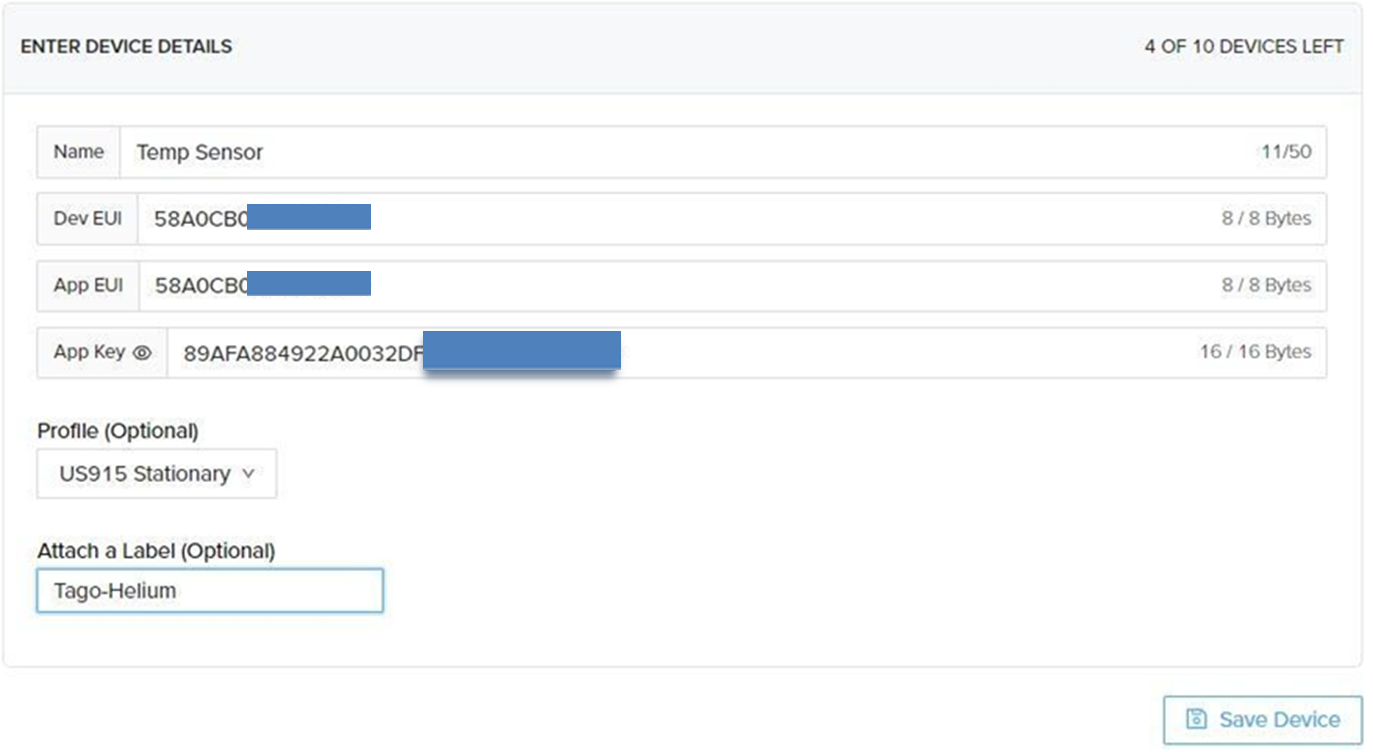
Browan Temperature Humidity Sensor: Device name, device-specific EUIs, AppKey, profile, and label.
When you have entered all of the information, click Save Device.
Optional: add a second Dragino Door sensor to independently monitor an entry door according to the steps outlined above. Remember to give the device a unique name, like Door Sensor, and add the Tago-Helium label.
Finally, activate all sensors and verify that all sensors have been onboarded, include the Tago-Helium label, and have successfully joined the Helium network.
Although most LoRaWAN devices will join the network within a few minutes of activation, in some situations LoRaWAN devices may take up to 12 hours to join. Please refer to the device’s product manual for details on join behavior. If a device fails to join, please refer to the troubleshooting checklist outlined above.
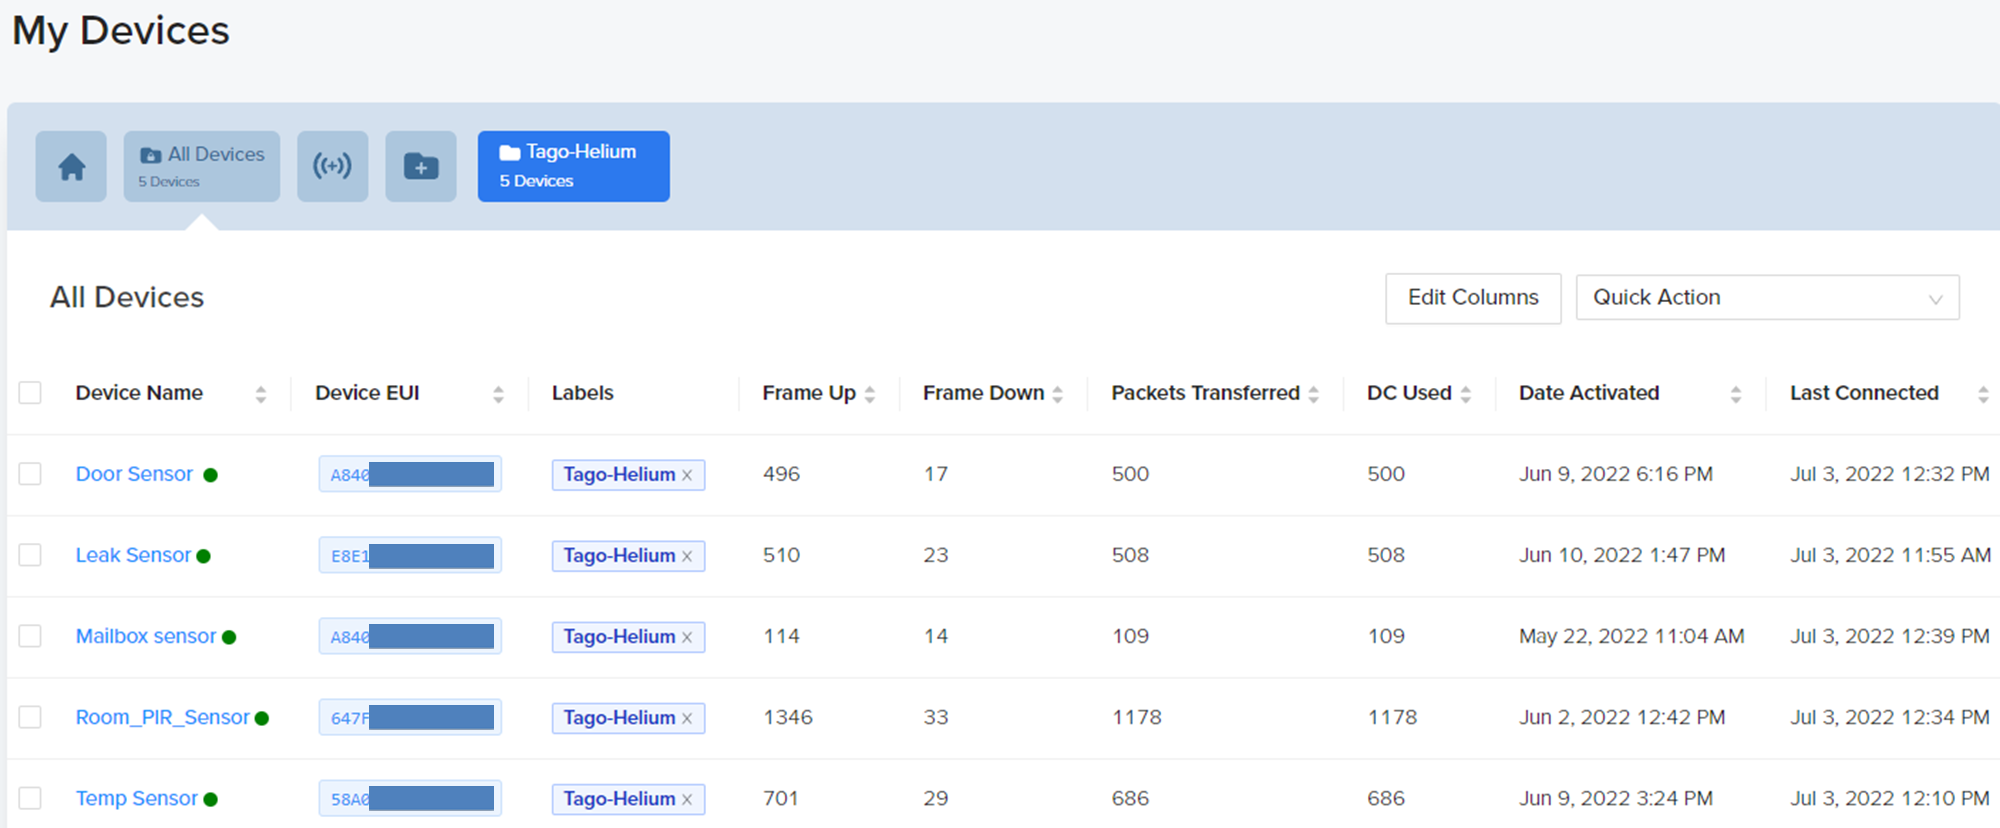
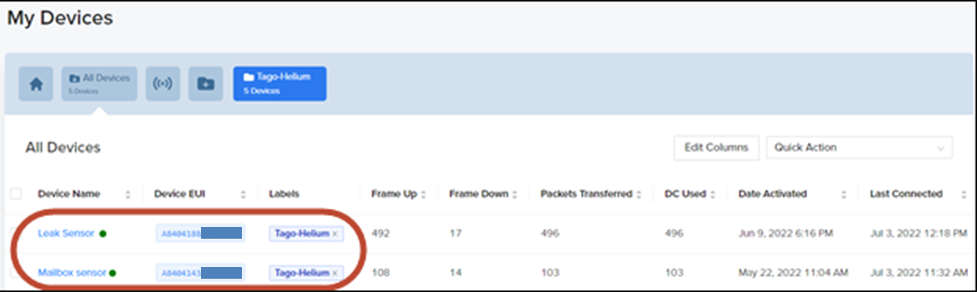
Use the My Devices view to verify the configuration and status of all sensors.
Connecting the Tago-Helium label to integration flows.
All of our devices have been onboarded and are associated with a unique label. The final step is to associate the label with the TagoIO integration and create a flow so that messages from all sensors assigned to the label get sent to TagoIO.
From the left-hand menu of Helium Console, click Flows:
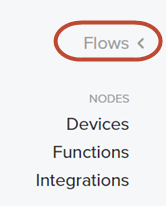
The Flows menu option
Note
The Flows page will display the flow for the mailbox sensor that we previously created to route messages from the mailbox sensor to TagoIO.
Next, add the Tago-Helium label to the flows by selecting its icon from the top Nodes menu and then dragging it down into the workspace.
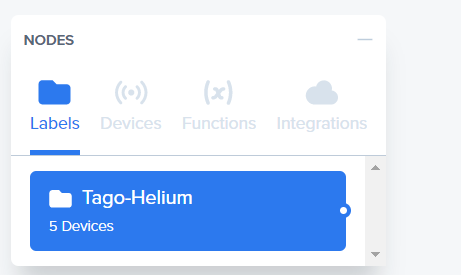
Click and drag the Tago-Helium label into workspace.
Now, connect the Tago-Helium label (blue) to the Tago-Helium integration (green) by dragging a connector between the two white dots of the respective icons, resulting a dashed line connection. Notice that the device-specific Mailbox sensor flow you created earlier co-exists with the new Tago-Helium label flow. This demonstrates that a single integration can be used for any combination of devices or labels.

At this point, all messages from the smart building sensor set are being sent to the TagoIO integration. Our next step is to add each device and its DevEUI to TagoIO.
Adding the Smart Building sensor set to TagoIO
- Log in to your TagoIO account, then click the Devices icon.
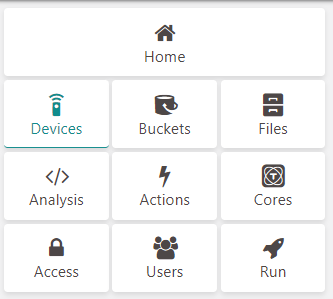
Click the Devices icon
- Click the +Add Device icon in the menu at the upper right corner of the screen.

Add additional devices to TagoIO
- Enter Browan Water Leak and select the LoRaWAN Helium network from the search menu in the middle of the screen, as shown below.
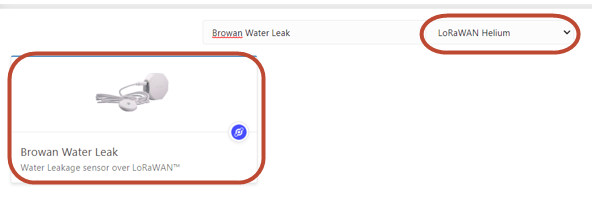
Connect the Browan Water Leak sensor to the LoRaWAN Helium network
- Click on the Browan Water Leak item and enter a unique device name and the device’s DevEUI.
- Click Create my Device.
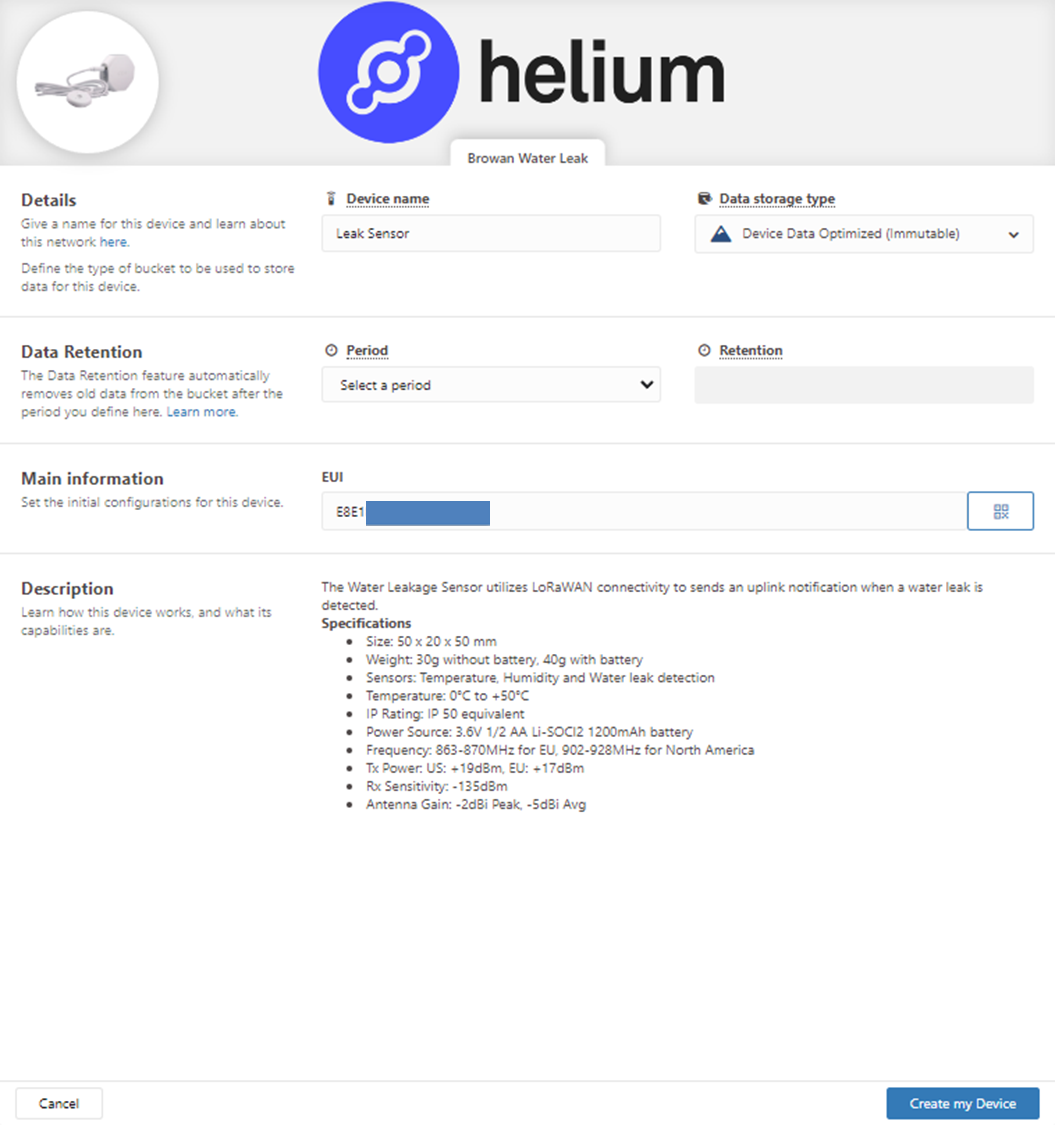
Example TagoIO add device summary
After TagoIO creates the device, select Continue and then Finish on the next screen.
Note
Important! Do not generate a new authorization; we will use the existing Helium-Tago authorization we created previously.
When the process is complete, the following All done message displays.

All Done message
Repeat the process above to add the remaining devices in the Smart Building sensor set.
For example, to add the Tektelic Smart Home sensor, add the device and then enter Tektelic Smart Home Sensor. Complete onboarding this device by providing a unique name and the device’s DevEUI. Click Create my Device, then Continue, and finally Finish on the next screens. Do not create a new authorization.
Enter “Browan Temperature” and select the “LoRaWAN Helium” network.
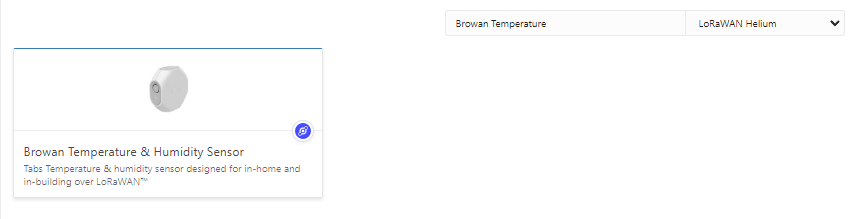
Complete onboarding by providing a unique name and providing the device’s DevEUI. Click “Create my Device,” then “Continue,” and then “Finish” on the next screens. Do not create a new authorization.
Optional: If you are using a second Dragino Door sensor, add this device per the previously outlined steps and assign it a unique name.
Now that the Smart Building LoRaWAN sensors have been added to the Helium network and the corresponding EUIs have been added to the TagoIO dashboard, let's connect them to the TagoIO Smart Building Monitoring template.
The TagoIO platform offers an easy way to share, duplicate, and distribute dashboards by creating templates. For example, you could create a reference template for a dashboard customized to individual commercial sites, such as offices, warehouses, or restaurants. You can export a template and share it with others, who can quickly import it and use it to support new site deployments.
For our Smart Building monitoring solution, we will import and use the following template: Smart Building Monitoring Reference Template.
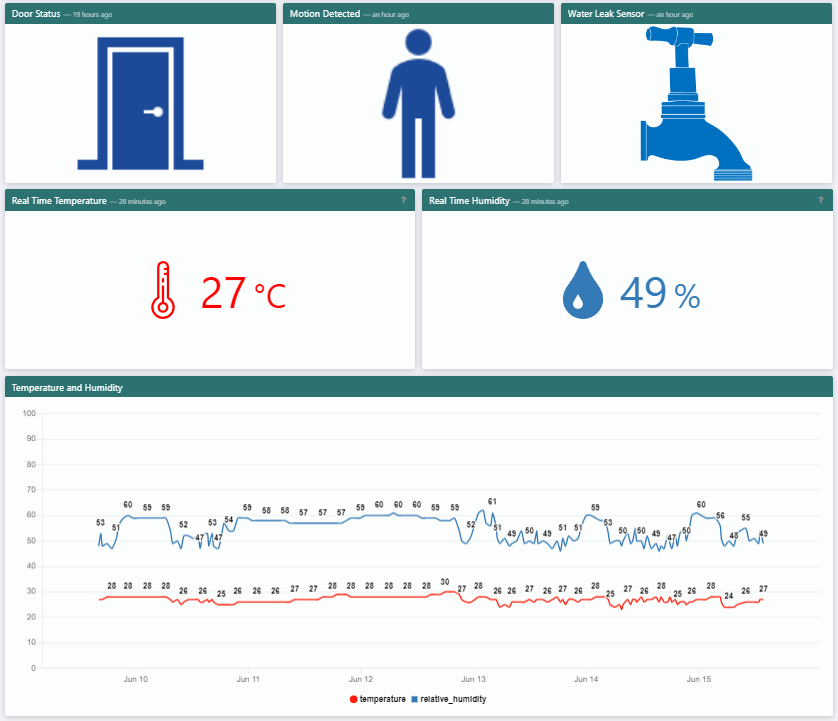
Basic Smart Building Monitoring Reference Template
The basic Smart Building Monitoring Reference Template provides animated graphic icons for door, motion, and water leak sensor status and temperature-humidity readings. It also provides a table-based history for all sensor data, which can be downloaded as CSV files.
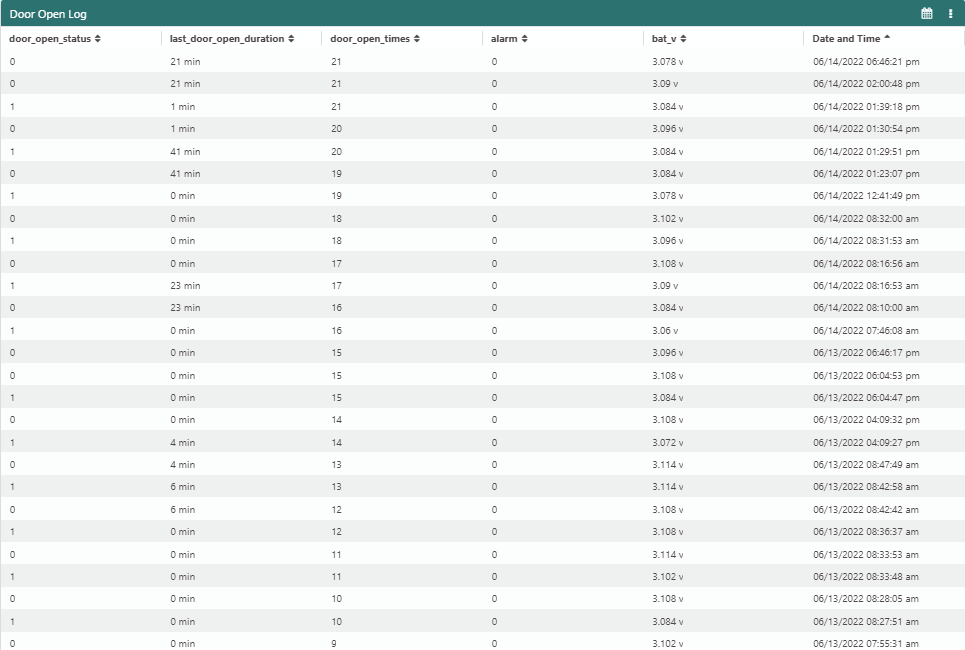
Table-based sensor data
TagoIO templates must be associated with data from sensors. They also provide a utility for defining the specific devices with which the template is compatible.

A TagoIO template including its device dependency requirements.