LoRa® on-premise - at Home and in the Office documentation
Setting up your devices on ChirpStack
Adding The Devices
Note
Each device in the network server represents a real-world end device that will connect and communicate over the LoRaWAN® network.
Next you will add the devices, one for each application. There are three devices to add:
-
Browan door and window sensor. You will add this to the Door/Window Sensor Application
-
Browan PIR motion sensor. You will add this to the Motion Sensor Application
-
Browan temperature and humidity sensor. You will add this to the Temperature Humidity Application
Before you can add these devices, you’ll need to get the device keys from the vendor.
Locate Device EUI and Key
You need to locate two pieces of information per device before you can add it to the network server:
-
The Device EUI (DevEUI)
-
The Device’s Network Key (NwkKey)
Note
The Browan devices implement LoRaWAN 1.1, but are backwards compatible with 1.0.3. The device profile has been set to 1.0.2 to maximize support for these devices. For this reason, you will need to use the Network Key instead of the Application Key. For any other typical 1.0.x device, you would use the actual Application Key (AppKey) instead of the Network Key. In case you are not sure when adding your own devices in the future, use the Application Key first and if you get an error when joining, use the Network Key.
Typically the device vendor will email you these keys after your purchase confirmation.
For example, if you purchased your devices from CalChip Connect, you will receive a Claim Key with the devices. Find the Device EUI and Network Key by entering the Claim Key into this online form.
Add the Door and Window Device
-
Open the UI of your ChirpStack network server by browsing to
http://*{RASPBERRY_PI_IP_ADDRESS}*:8080/if you haven’t already done so. -
Click Applications in the menu on the left.
-
Click on the Door/Window Sensor Application.
-
Click the Add device button.
-
Complete the fields in the open Device tab as follows:
-
Name:
Enter the text Door/Window.
-
Description:
Enter an optional description.
-
Device EUI (EUI64):
Enter the DevEUI for the Door and Window Sensor you found in the previous section.
-
Device profile:
In the device profile dropdown, select the Door/Window Sensor profile.
-
Device is disabled:
Leave this switched off.
-
Disable frame-counter validation:
Leave this switched off.
-
-
Click the Submit button to save the device.
-
Make sure the device tab OTAA keys is selected.
-
Paste the Network Key (NwkKey) for the end device into the Application Key field.
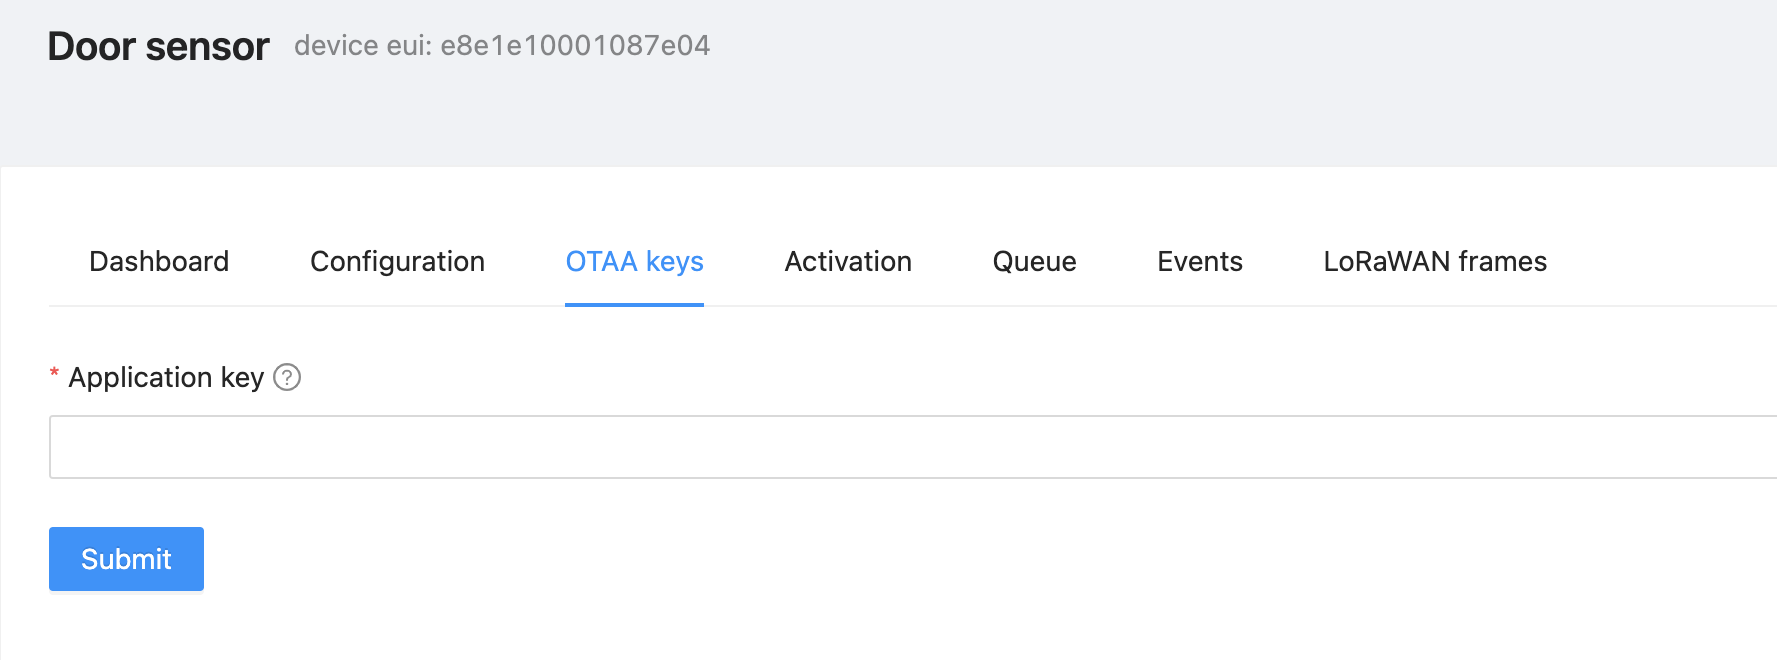
Figure 9: The Application Key field for OTA Activation
-
Click Submit to update the application key.
Add the Motion Sensor Device
-
Open the UI of your ChirpStack network server by browsing to
http://*{RASPBERRY_PI_IP_ADDRESS}*:8080/if you haven’t already done so. -
Click Applications in the menu on the left.
-
Click on the Motion Sensor Application.
-
Click the Add device button.
-
Complete the fields in the open Device tab as follows:
-
Name:
Enter the text Motion.
-
Description:
Enter an optional description.
-
Device EUI (EUI64):
Enter the DevEUI for the Motion Sensor you found in the previous section.
-
Device profile:
In the device profile dropdown, select the Motion Sensor profile.
-
Device is disabled:
Leave this switched off.
-
Disable frame-counter validation:
Leave this switched off.
-
-
Click the Submit button to save the device.
-
Make sure the device tab OTAA keys is selected.
-
Paste the Network Key (NwkKey) for the end device into the Application Key field.
-
Click Submit to update the application key.
Add the Temperature and Humidity Sensor Device
-
Open the UI of your ChirpStack network server by browsing to
http://*{RASPBERRY_PI_IP_ADDRESS}*:8080/if you haven’t already done so. -
Click Applications in the menu on the left.
-
Click on the Temperature/Humidity Application.
-
Click the Add device button.
-
Complete the fields in the open Device tab as follows:
-
Name:
Enter the text Temperature and Humidity.
-
Description:
Enter an optional description.
-
Device EUI (EUI64):
Enter the DevEUI for the Temperature and Humidity Sensor you found in the previous section.
-
Device profile:
In the device profile dropdown, select the Temperatur & Humidity Sensor profile.
-
Device is disabled:
Leave this switched off.
-
Disable frame-counter validation:
Leave this switched off.
-
-
Click the Submit button to save the device.
-
Make sure the device tab OTAA keys is selected.
-
Paste the Network Key (NwkKey) for the end device into the Application Key field.
-
Click Submit to update the application key.