LoRa® on-premise - at Home and in the Office documentation
Setting up your devices on ChirpStack
Create the Device Profiles
In this section you are going to create device profiles for your sensors, using existing templates.
Note
A device profile defines a device’s capabilities and boot parameters. It is a reusable profile, created once for each device type and firmware version you add to the network server.
The devices in this lab all have a device profile template you can use to generate the device profile. Using an existing device profile template means you don’t have to figure out all the settings for your device(s) and makes it simple to add a device.
-
Open the UI of your ChirpStack network server by browsing to
http://*{RASPBERRY_PI_IP_ADDRESS}*:8080/if you haven’t already done so. -
Click Device profiles inside the Tenant section of the menu on the left.
Browan Door and Window Sensor Profile
-
Click the Add device profile button.
-
Click the Select device-profile template button. The Select device-profile template popup appears.
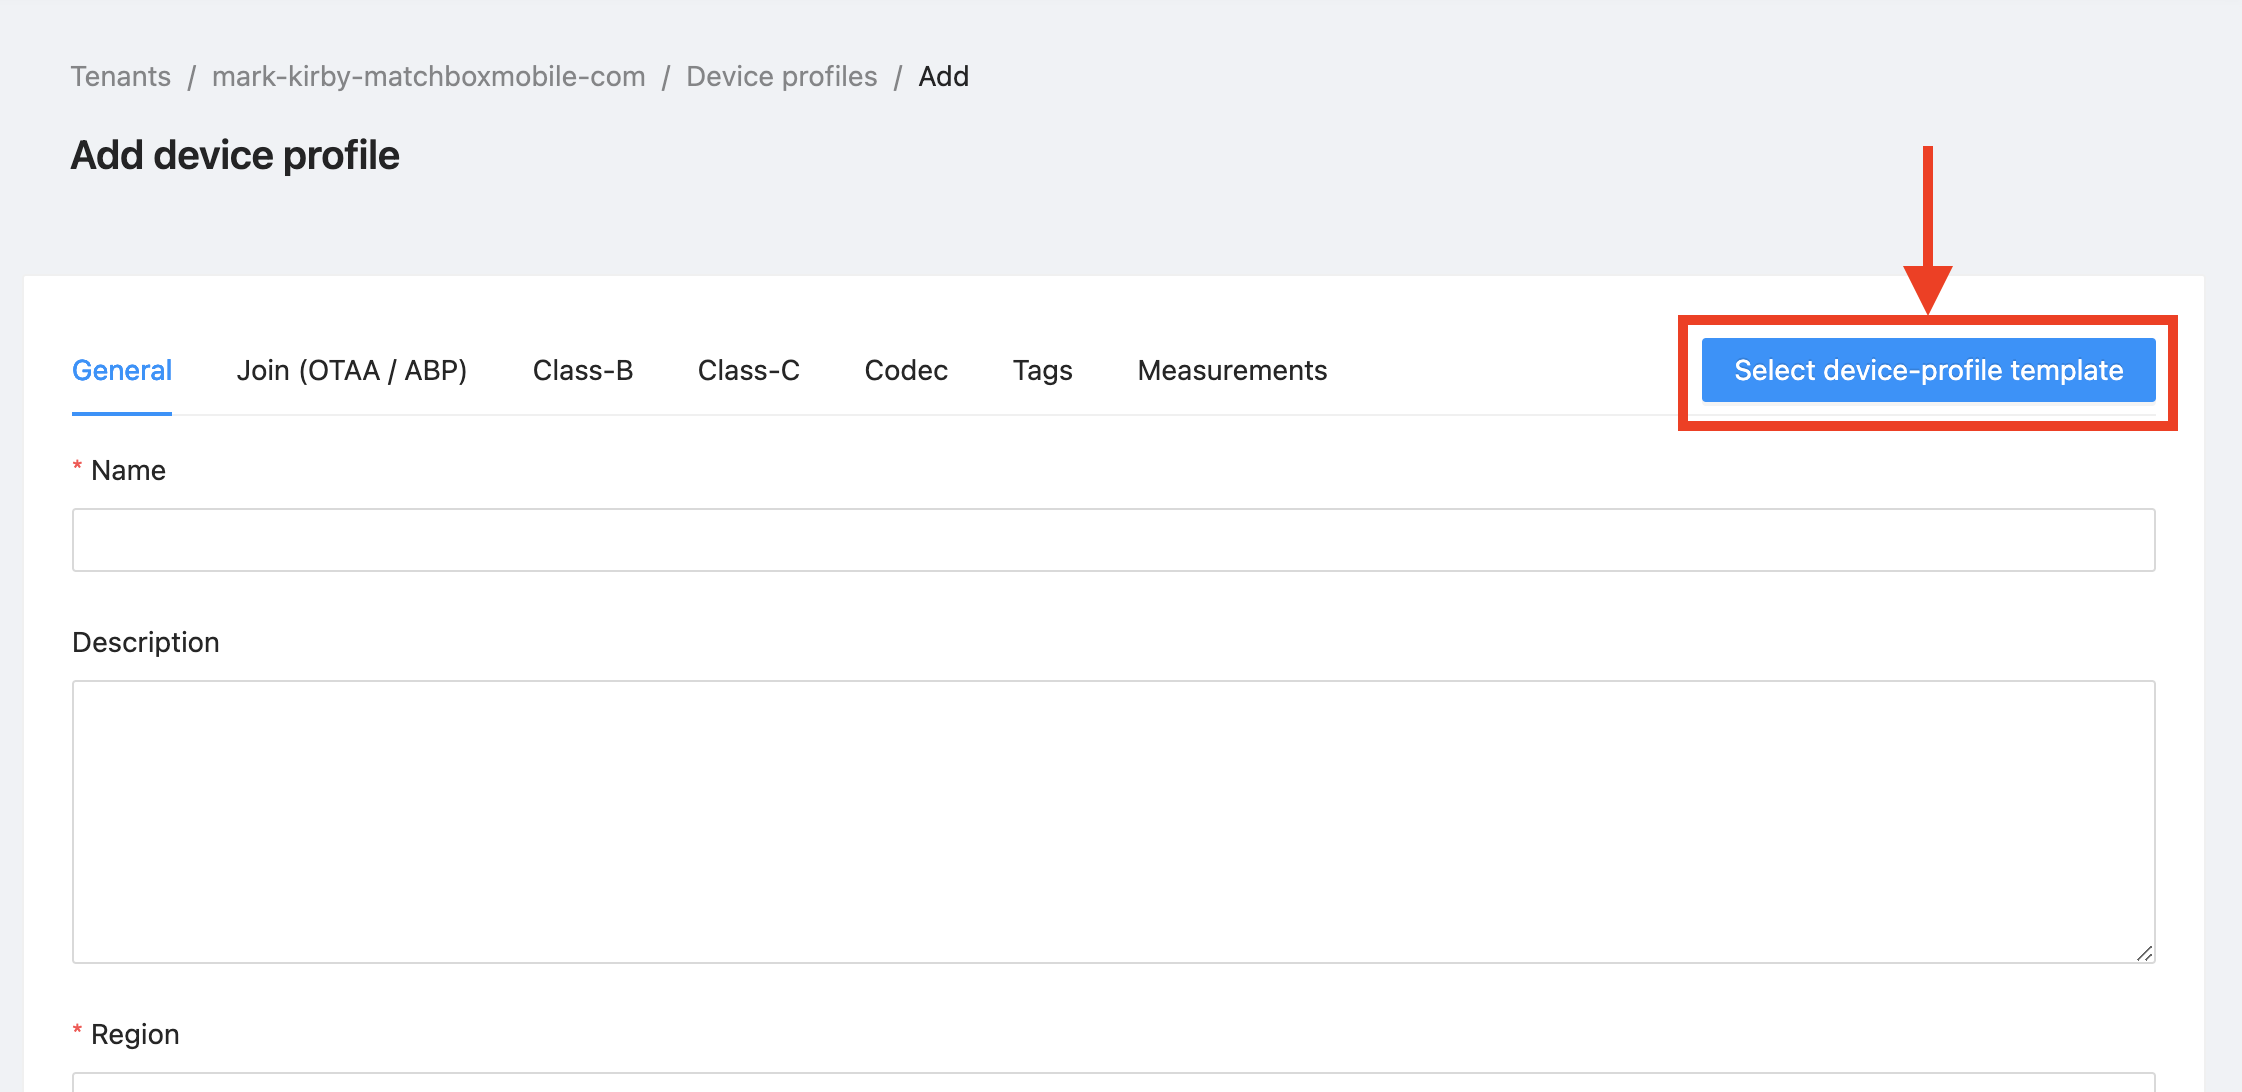
Figure 4: The Select device-profile template Button
-
Click the Select a device-profile template dropdown in the Select device-profile template popup.
-
A list of device manufacturers appears. Scroll down and click on Browan Communication Incorp.
-
From the list of Browan devices, click on the Door/Window Sensor.
-
A list of firmware versions appear. Click the Firmware version for the device you purchased, FW version: 1.0.1 at time of writing.
Note
If you are not sure of the firmware version, check the data sheet that came with the device.
-
A list of one or more supported regions available for the device and firmware version appears next to the firmware version. Click on the region your device supports.
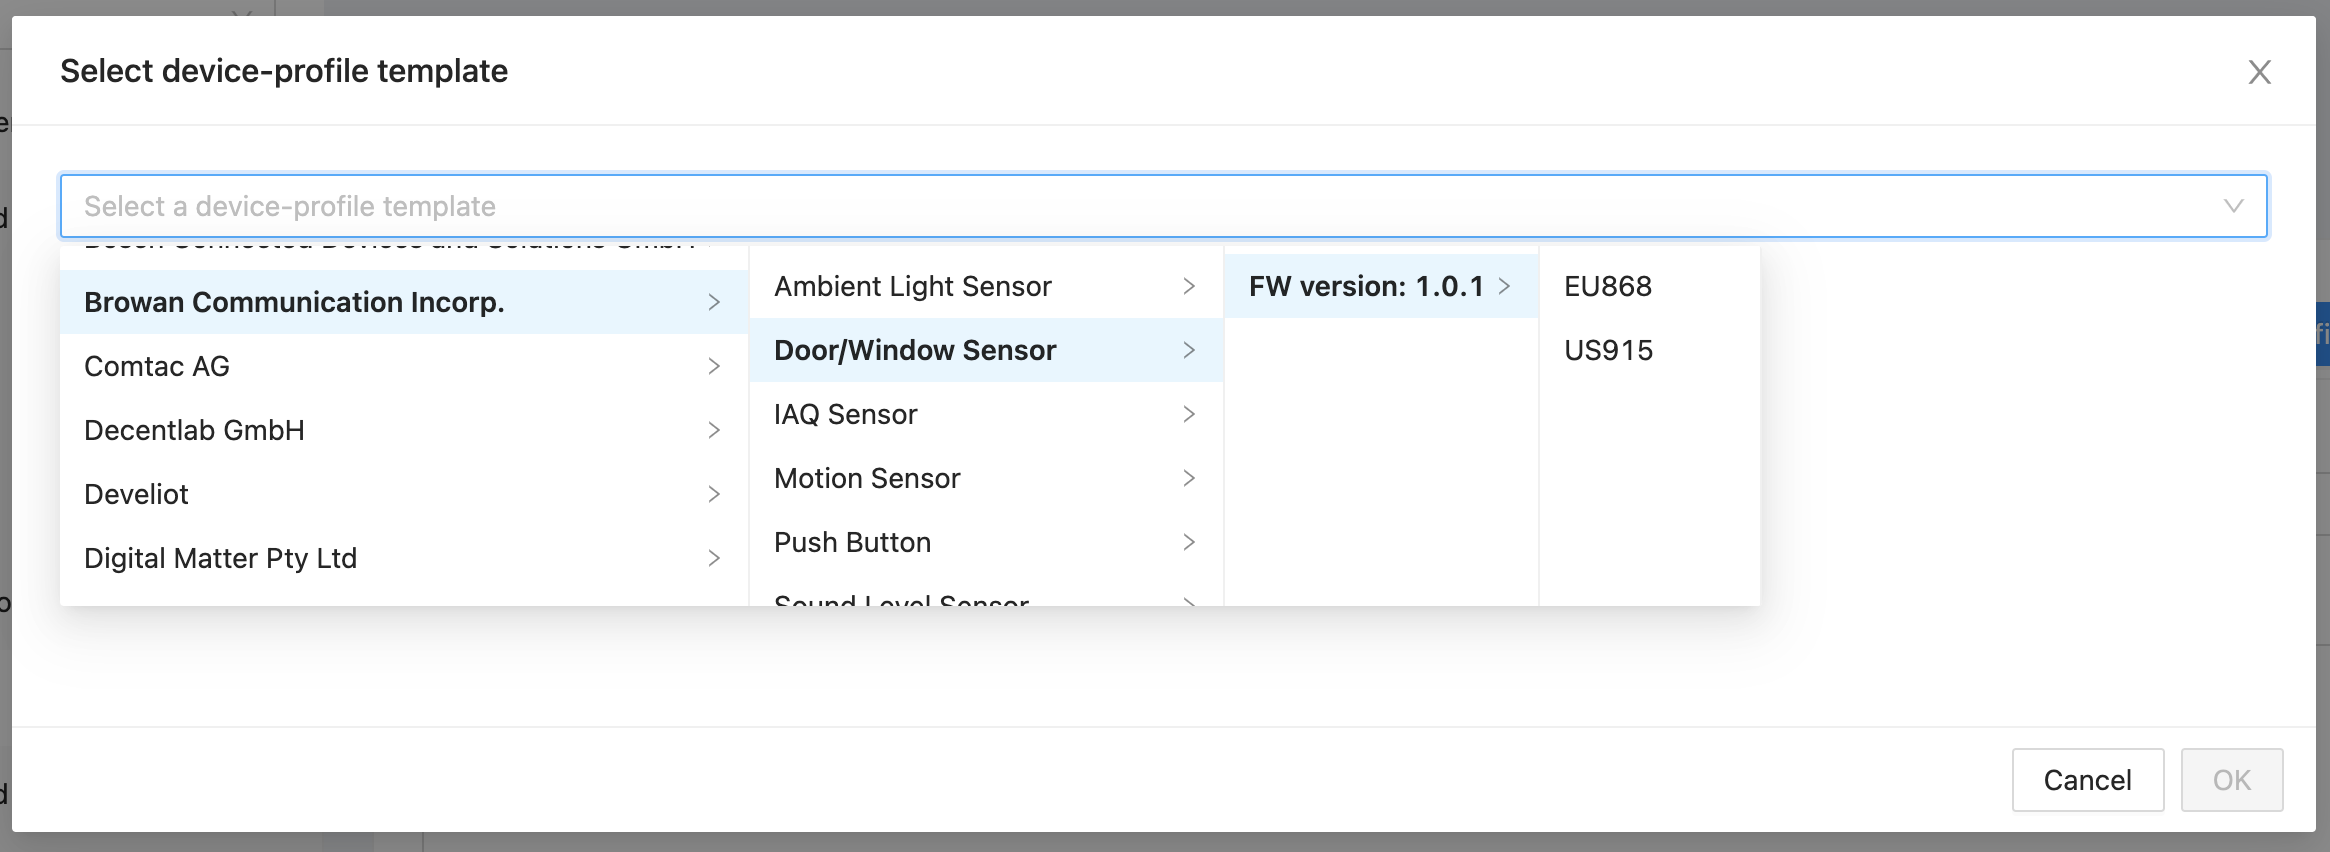
Figure 5: The Select a device-profile template Dropdown with Manufacturer, Device, and Firmware Version Selected
-
The template name appears in the Select a device-profile template dropdown. Make sure that this is all correct, then click the OK button to select the template.
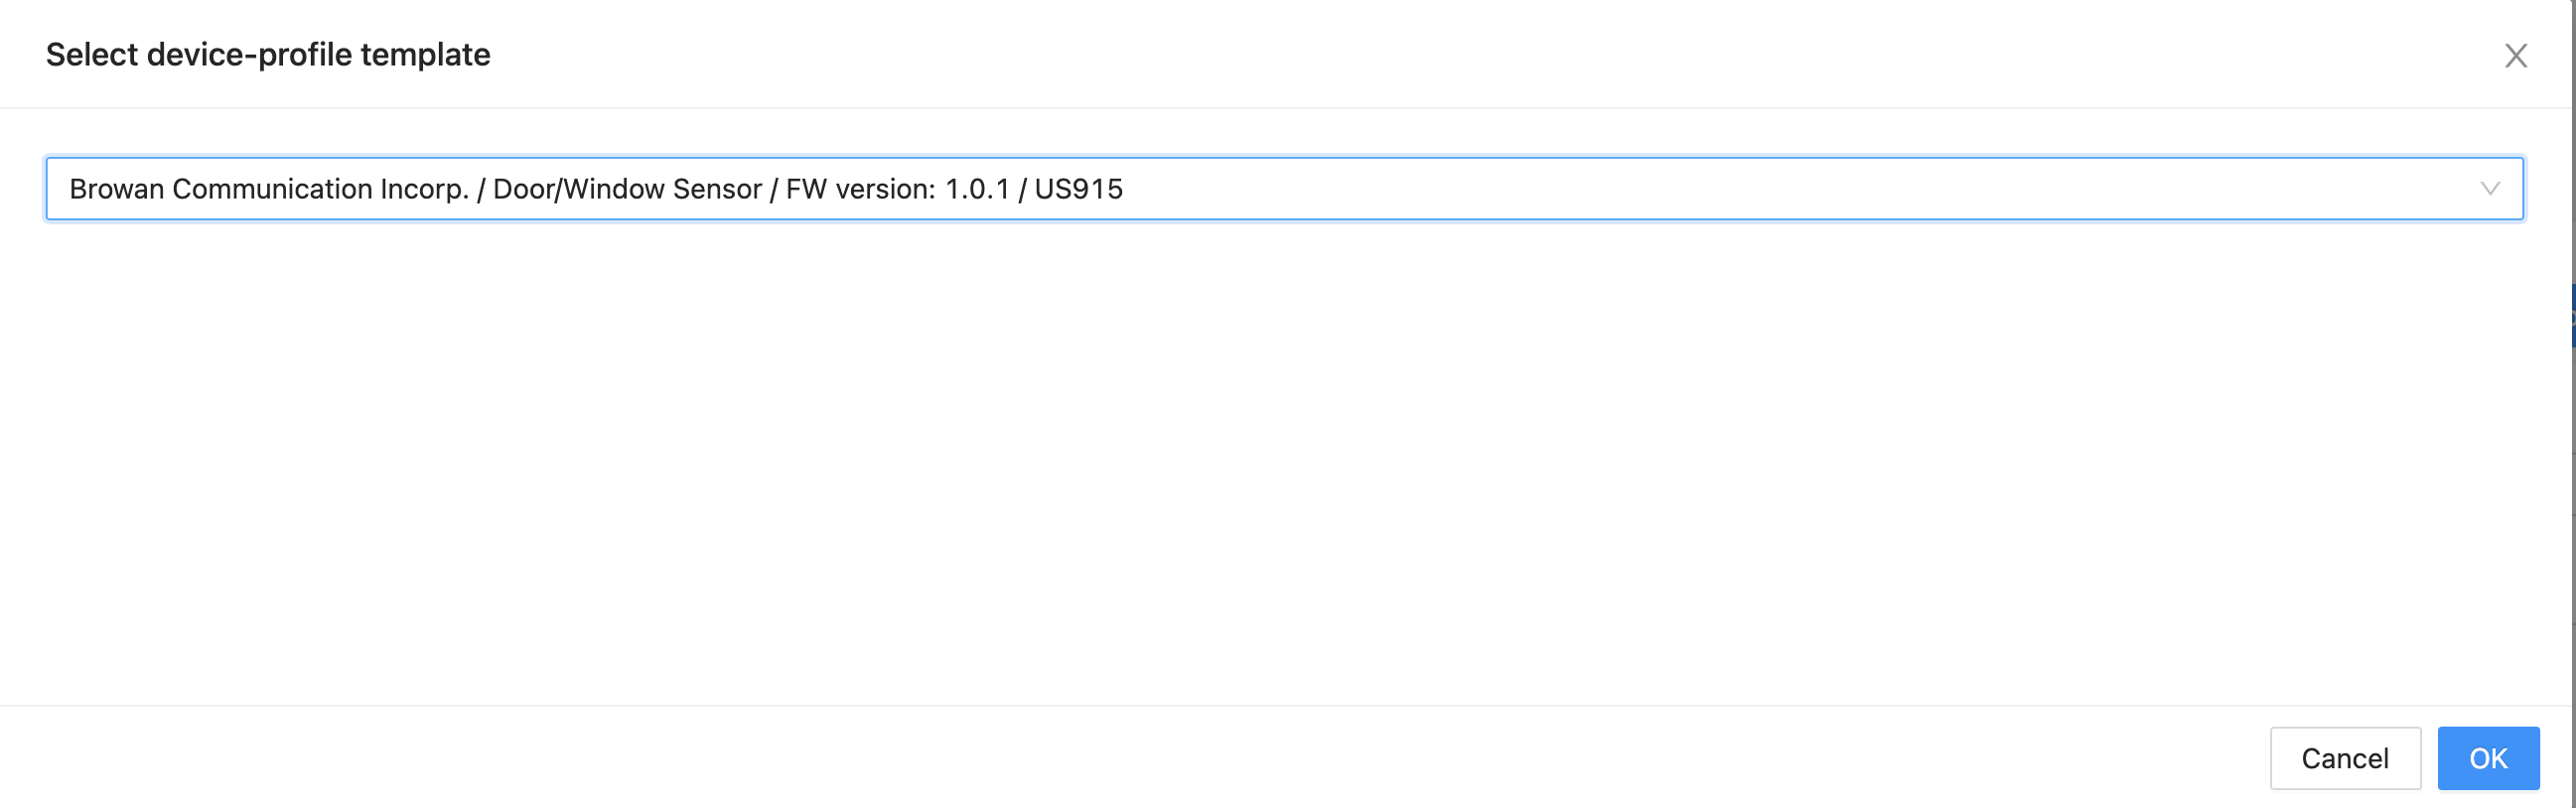
Figure 6: The Select a device-profile template Wizard Completed
-
The template populates all the fields in the device profile for you.
Note
Here, you may update the Device-status request frequency (req/day) field to the number of times per day you would like the network server to request the end device battery level and status.
-
Click Submit to save the device profile. The device profile appears in the Device profiles list.
You have now created a device profile for the Browan Door/Window Sensor. You will use this device profile later when you add your door/window sensor to your application on the ChirpStack network server in the next section.
Browan PIR Motion Sensor Profile
-
Click the Add device profile button.
-
Click the Select a device-profile template dropdown in the Select device-profile template popup.
-
Scroll down and select Browan Communication Incorp.
-
From the list of Browan devices, click on Motion Sensor, choose the firmware version for the device you own, and choose the region your device supports.
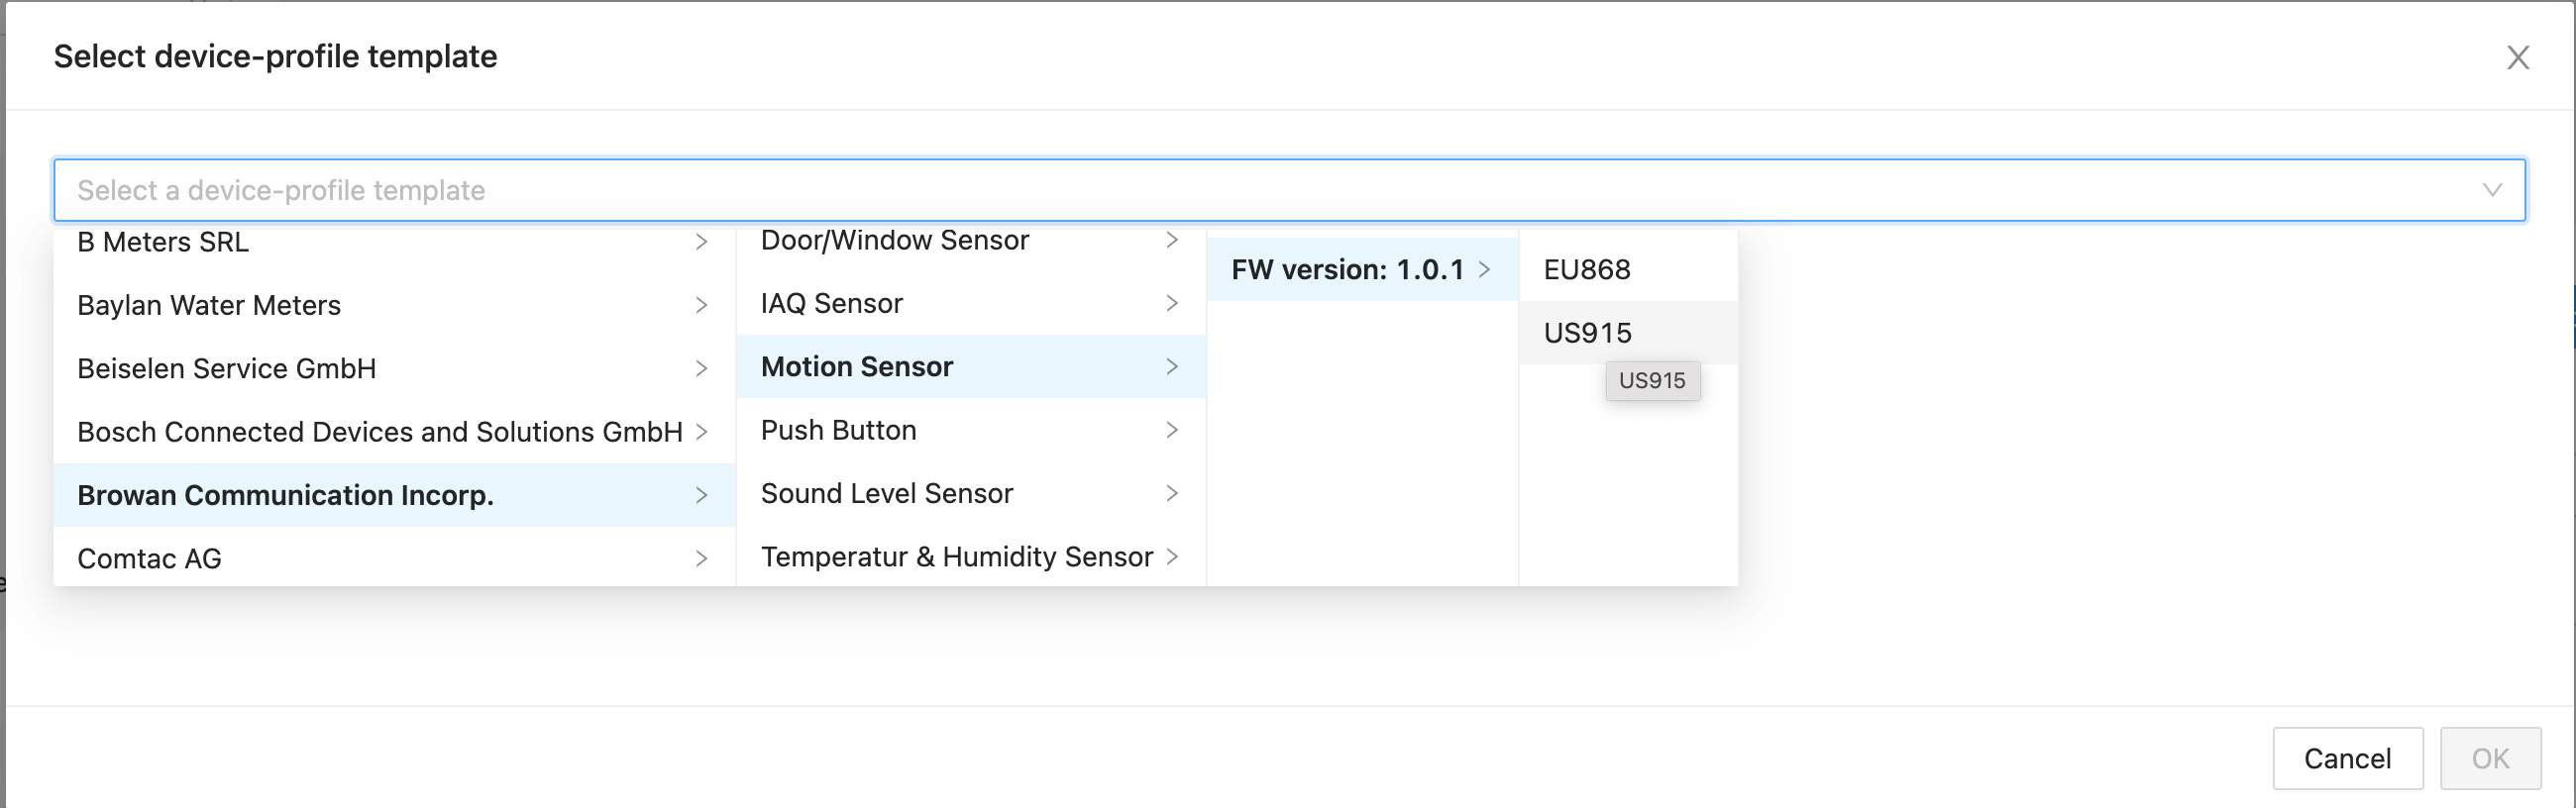
Figure 7: The Select a device-profile template Dropdown with Manufacturer, Device, and Firmware Version Selected
-
The template name appears in the Select a device-profile template dropdown. Make sure that this is all correct, then click the OK button to select the template.
Browan Temperature and Humidity Sensor Profile
-
Click the Add device profile button.
-
Click the Select a device-profile template dropdown in the Select device-profile template popup.
-
Scroll down and select Browan Communication Incorp.
-
From the list of Browan devices, click on the Temperatur & Humidity Sensor (sic), choose the firmware version for the device you own, and choose the region your device supports.
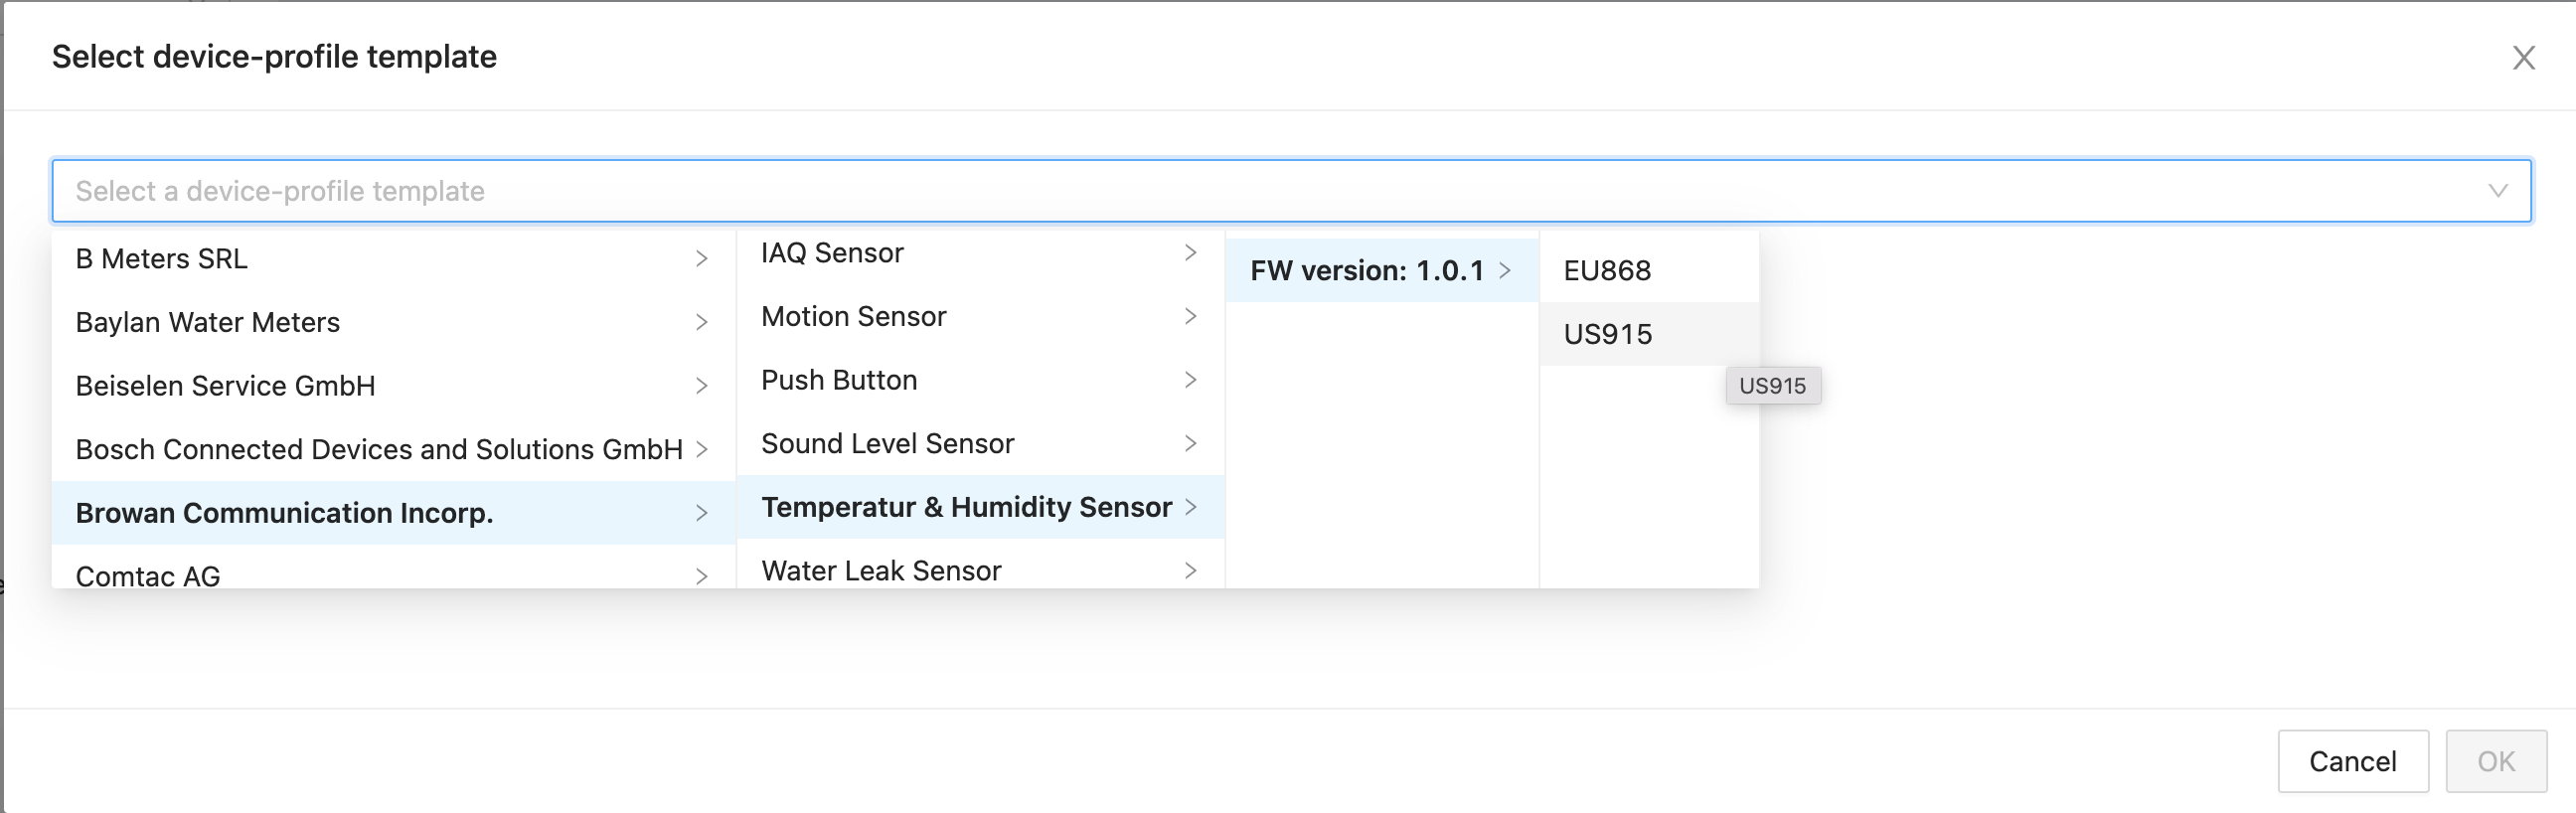
Figure 8: The Select a device-profile template Dropdown with Manufacturer, Device, and Firmware Version Selected
-
The template name appears in the Select a device-profile template dropdown. Make sure that this is all correct, and then click the OK button to select the template.
Now that you have created and added the three device profiles to your application, it is time to add the real devices using the profiles you’ve created. You’ll do that in the next section.