LoRa® on-premise - at Home and in the Office documentation
Installing and configuring the gateway
Connect the Gateway to the Internet
You can use either Ethernet or Wi-Fi to connect your Raspberry Pi to the internet.
Using Ethernet
-
Plug one end of an Ethernet cable into the Raspberry Pi’s Ethernet port.
Plug the other end into an Ethernet port on your home network router, hub or Powerline adapter.
-
Turn on the Raspberry Pi. The network LED’s should light up.
-
Go to the section Find the Gateway on Your Network.
Using Wi-Fi
To connect the gateway to the internet using Wi-Fi, you need an SSH tool. Linux and macOS machines have SSH preinstalled, and the Windows 10 April 2018 update and later versions of Windows include SSH enabled by default. If you have an earlier version of Windows, use the third-party client PuTTY.
To connect:
-
Wait until you see the access point ChirpStackAP listed among the available Wi-Fi networks on your machine.
-
Connect your machine to the Wi-Fi access point ChirpStackAP.
-
Enter the password:
ChirpStackAP
If you are on a Windows machine, the Wi-Fi connection wizard may prompt you for a PIN before it allows you to join the gateway access point. Click Connect using a security key instead to enter the password.
-
Once connected to the ChirpStack access point, the tool you use for interacting with the gateway depends on your operating system.
If you are using Linux or macOS, use SSH.
If you are using Windows, check to see if SSH is available:
-
Enter the text PowerShell into the Windows Search bar.
-
Open PowerShell.
-
At the prompt enter:
ssh
If no error message displays, SSH is installed on your PC, and you can proceed to the next step.
If an error does display, download PuTTY, install it, and then proceed to the next step.
-
-
The next step you take depends on whether you are using SSH or PuTTY.
If you are using SSH (Linux, macOS, or Windows with SSH installed):
-
If you are using Linux or macOS, open Terminal. If you are using Windows, open PowerShell.
-
Enter the following command:
ssh admin@192.168.0.1
-
If you are asked whether you are sure you wish to connect, enter:
yes
-
Enter the default password:
admin
If you are using PuTTY:
-
Open PuTTY.
-
Enter 192.168.0.1 in the Host Name (or IP address) field as shown below, and then click Open.
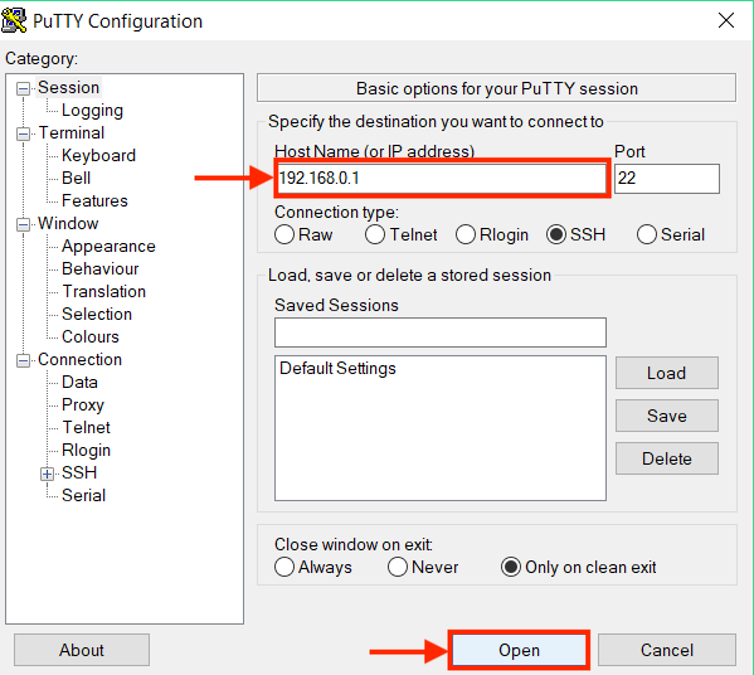
Figure 1: Host Name (or IP address) Field in the PuTTY Configuration Window
Warning
A warning that the host key is not cached may display. This is normal. You can safely click Yes to continue.
-
At the login prompt enter:
admin
-
At the password prompt, enter:
admin
-
-
The welcome screen displays.
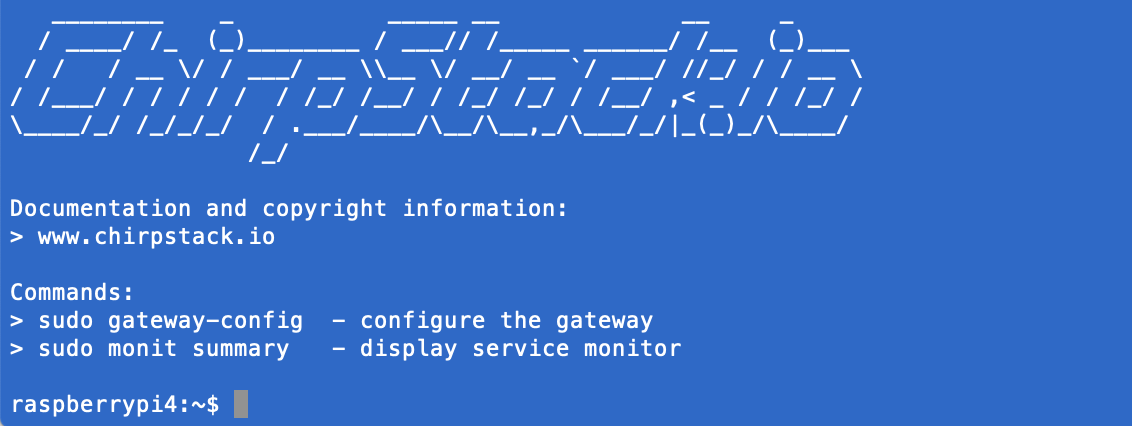
Figure 2: ChirpStack Welcome Screen
-
Enter the following command:
$ sudo gateway-config
-
Enter the admin password at the prompt:
admin
-
The menu screen displays.
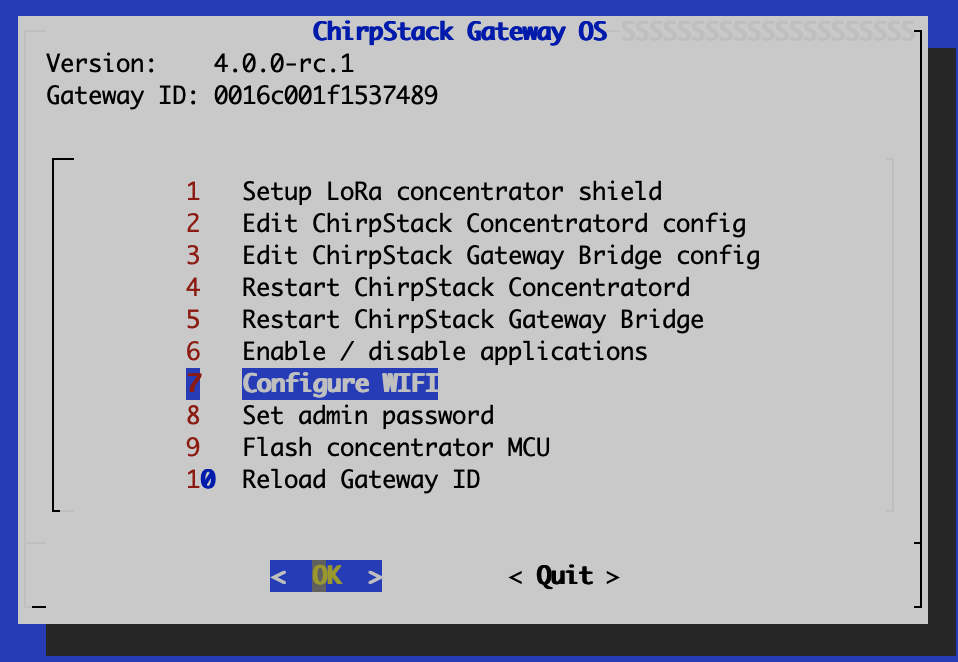
Figure 3: ChirpStack Menu Screen
-
Using the arrow keys, press the down arrow to select Configure WIFI, and press Enter to select OK.
-
Enter your network’s SSID. Press Enter to select Ok.
Warning
The SSID is case sensitive. If you mistype your SSID, you must re-flash the SD card and try again.
-
Enter your network password and press Enter to select Ok.
Warning
The password is case-sensitive. If you mistype your password, you must re-flash the SD card and try again.
-
The reboot confirmation screen displays. Press Enter to select OK.
Note
On reboot, the access point is no longer exposed. This disconnects your Raspberry Pi from SSH / PuTTY.
-
After a couple of minutes, the Pi should be back up and connected to the Wi-Fi network. Connect your computer’s Wi-Fi back to the Wi-Fi access point you just connected the Raspberry Pi to if it does not automatically reconnect.